Build and Publish an Agent using Copilot Chat
This demo walks through how to build a virtual assistant using Copilot Studio via Copilot Chat and publish it to Microsoft 365 Copilot.
Demo Setup
In order to complete these demos, you will need to download the following files:
- Delivery Drone Press Release.docx
- Delivery Drone Troubleshooting.docx
- Delivery Drone SOP.docx
- Upselling Opportunities.docx
- Delivery Drone FAQ.docx
TIP: Before delivering the demo, you can create a SharePoint site in your demo environment to store all the files for easy access. Alternatively, you can store the files locally and reference them directly in your prompts using /.
Talking Points
Copilot Studio lets us build custom copilots, tailored to specific projects, departments, or knowledge bases. We can give them a personality, set their boundaries, and feed them specific documents to ensure high-quality, grounded responses.
In this demo, we’ll create a virtual assistant for the ReleCloud drone delivery project. The assistant will know everything we’ve uploaded and will help answer team questions, saving time and improving productivity.
Demo Steps
Step 1 – Navigate to Copilot Studio
-
Go to https://m365.cloud.microsoft/chat and select Create agent in the right-hand rail.

-
Sign in using your credentials.
Step 2 – Define Your Agent
-
Add the following description when prompted:
You're a virtual project manager assistant for our drone delivery project. You know everything about the project from the documents we've shared with you, and are happy to help team members get the information they need.
-
Name the assistant:
Drone Delivery Assistant -
If asked for confirmation:
Yes, thank you -
If prompted for what to avoid or emphasize:
Please be clear and concise and avoid long answers. Where possible, refer primarily to the knowledge shared with you. If you don't know the answer, refer them to the drone delivery project manager. -
If prompted for tone of voice:
Friendly and professional
IMPORTANT: You may not be prompted for all of these options, depending on your environment. If you are not prompted, you can add this information using the Configure tab within Copilot Studio.
Step 3 – Configure the Agent
- Click Configure to open the agent editor.
-
Review and optionally update the Instructions section:
Your name is Drone Delivery Project Manager Assistant. You serve as a virtual project manager for the ReleCloud drone delivery project, with comprehensive knowledge from shared documents. Be clear and concise, avoiding long answers. If the answer is unknown, refer to the drone delivery project manager. -
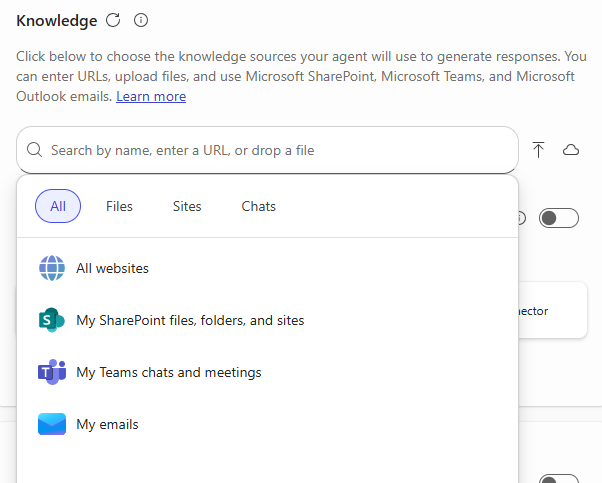
Scroll down to the Knowledge section and click into the Search by name or enter a URL text bupple. Select Files and add the following documents to the agent’s knowledge base:
- Delivery Drone Press Release.docx
- Delivery Drone Troubleshooting.docx
- Delivery Drone SOP.docx
- Upselling Opportunities.docx
-
Delivery Drone FAQ.docx
Step 4 – Test Your Agent
In the right-hand testing pane, try asking a few of the following questions:
Tell me about the ReleCloud Delivery Drone.How do I fix the drone error code D-101?What are the upsell opportunities for ReleCloud?What’s the duration of Phase 1 of the delivery drone project?
IMPORTANT: It can take some time for the agent to process the documents and provide accurate answers. If you receive an error message, wait a few minutes and try again.
TIP: You can also test via Microsoft Teams once the agent is live.
Step 5 – Publish and Share
- Click Create to publish the agent.
- Select Change share settings and choose Anyone in your organization.
- Copy the share link and paste it into a Teams chat for easy access.
Once live, you can interact with the agent in Teams chat or via @mentions.